
How To Install Kontakt Player Libraries
Our Kontakt Player libraries are installed via Native Access, a free download from Native instruments. Once installed, follow the instructions below to get up and running.
- Download and install Native Access.
- Open the Preferences and set the Download and Content location for your library:

- In the bottom left of Native Access, click Add Serial and enter your serial number:
- Open the Kontakt tab and find your library. If the entry shows an Install button you can directly install it:
- If the entry shows a Locate button instead, you have to download the library from the manufacturer first. After the download you can click the Locate button in Native Access and navigate to the library folder to select it. If you have any questions about downloading the library, please contact the library manufacturer’s support.
If you get the error message “That path is invalid”, please read this article.
How to Create Multiple Outputs in Kontakt and Route Them to a DAW
This guide covers how to set up multi-out routing for Soft Drums, Mallet Drums, and Indie Drums in Kontakt. Multi-out lets you send individual kit pieces (kick, snare, toms, cymbals, etc.) to separate mixer channels in your DAW for independent processing.
For additional help, visit Native Instruments website
Prerequisites
- Kontakt 6+ (full version recommended)
- Your DAW configured to receive multiple outputs from Kontakt
- Soft Drums, Mallet Drums, or Indie Drums loaded
Step 1: Load the Multi-Out NKI
- Open Kontakt as a plugin in your DAW or in standalone mode.
- Load the multi-out version of the drum library (e.g., “Soft Drums Multi-Out.nki”, “Mallet Drums Multi-Out.nki”, or “Indie Drums Multi-Out.nki”).
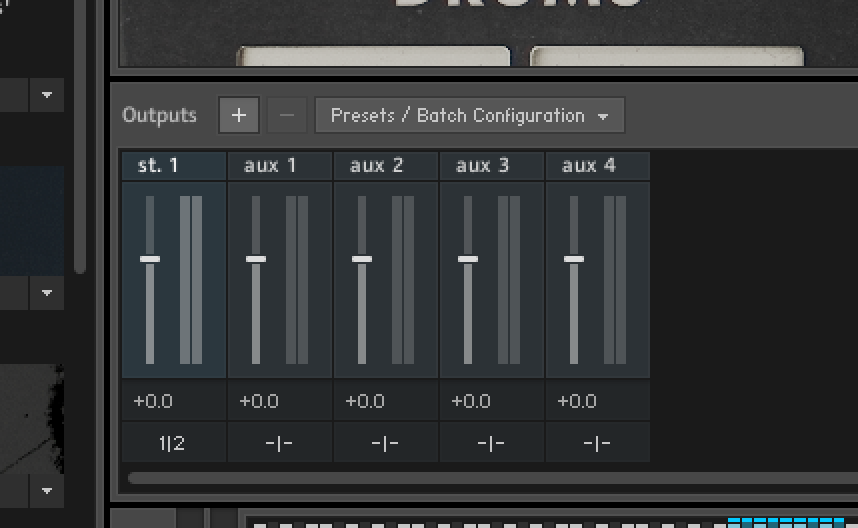
Step 2: Open the Output Section in Kontakt
- Click the Output button in the Kontakt header (or press
F2) to open the Output Mixer. - You’ll see the default stereo output channel (“st. 1”).
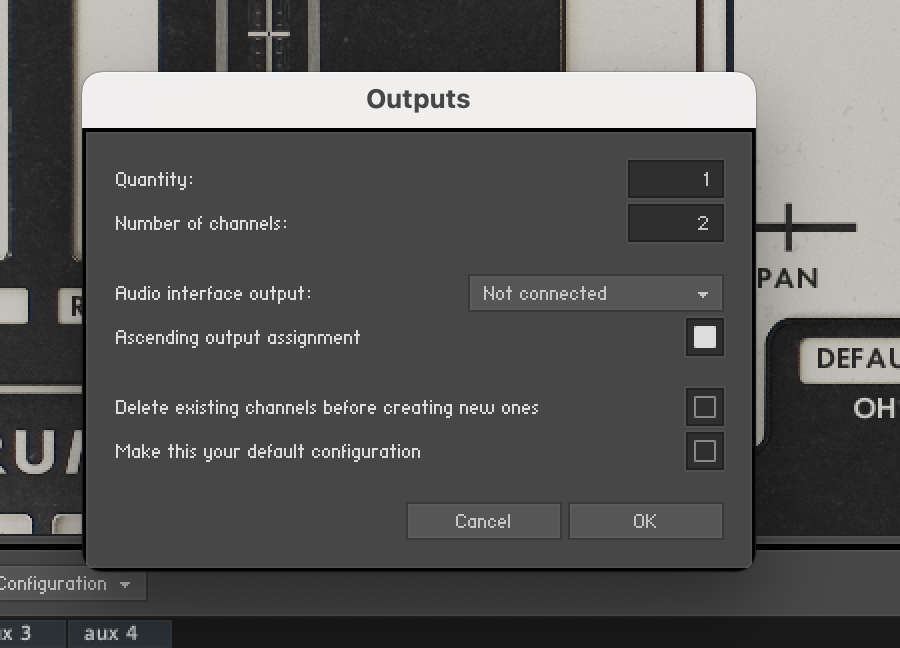
Step 3: Create Additional Output Channels
In the Output Mixer, click the + button to add new stereo output channels.
Create one output for each kit piece you want to route separately. Common setup:
- Kick
- Snare
- Toms
- Hi-Hat
- Cymbals / Overheads
- Room / Ambience (if applicable)
Name each output by double-clicking on the channel label.
Step 4: Assign Kit Pieces to Outputs
Somerville drum libraries include a ROUTE panel in the GUI for easy output assignment—no need to dig into Kontakt’s Edit Mode.
- Locate the ROUTE section on the instrument interface.
- Use the dropdown (e.g., “TOM LOW”) to select the kit piece you want to route.
- Below each mic type (CLOSE, OH, ROOM), click the DEFAULT button to assign that signal to a different output channel.
- The individual close mics can be routed to different channels, along with overhead, room, and kit (kit mic not pictured).
- Repeat for each kit piece.
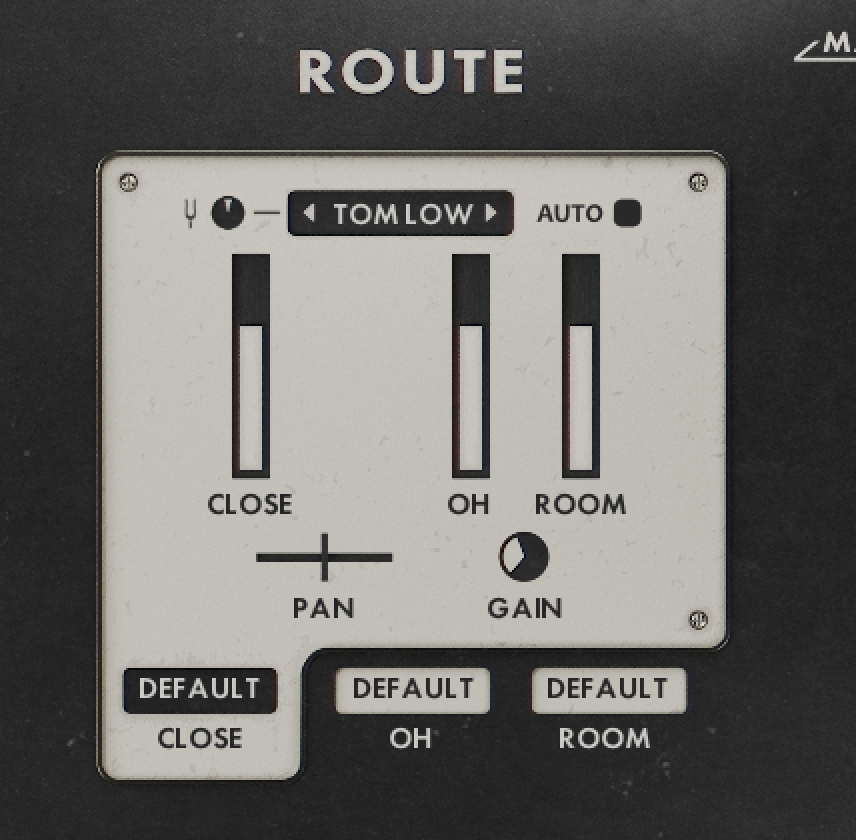
Tip: Use the PAN and GAIN controls in the ROUTE panel to fine-tune each mic’s position and level before it hits your DAW mixer.
Step 5: Configure Your DAW to Receive Multi-Out
This step varies by DAW. Here are quick instructions for common DAWs:
Logic Pro
- Click the + button on the Kontakt track header.
- Select Create New Auxiliary Channel Strip for each output.
- Assign each aux to the corresponding Kontakt output.
Pro Tools
- Insert Kontakt on a stereo instrument track.
- Create additional Aux Input tracks.
- Set each aux input to receive from the corresponding Kontakt output pair.
Cubase / Nuendo
- In the VST Instruments panel, click Activate Outputs on Kontakt.
- Enable each output pair you created.
- New mixer channels will appear automatically.
Ableton Live
- Unfold the Kontakt track in the mixer.
- Enable each output pair using the Audio To dropdown.
- Route each to a new audio track or group.
Studio One
- Right-click the Kontakt channel and select Expand.
- Enable additional outputs.
- New channels appear in the mixer.
Step 6: Mix and Process Individually
Once routed, you can:
- Apply EQ, compression, and effects to each kit piece independently.
- Adjust levels per element without affecting the full mix.
- Print stems for delivery or collaboration.
Troubleshooting
| Issue | Solution |
|---|---|
| No sound on new outputs | Confirm the group is assigned to the correct output in Kontakt’s Group Editor. |
| Outputs not appearing in DAW | Restart the DAW or re-scan plugins. Make sure outputs are activated in Kontakt. |
| Phasing or double signal | Ensure each group is routed to only one output. |
| Output names not showing | Rename outputs in Kontakt’s Output Mixer for clarity. |